Synthloom — Step-by-Step Tutorial
This guide walks you through every section of the Synthloom application. Follow the steps in order for your first run, or jump directly to any topic using the sidebar.
The core loop
Your journey with Synthloom is simple, powerful, and seamless:
Sign in
Pick your workspace.
Shape data model
Set up your structure.
Run generation
Start the process.
Download & validate
Get your results.
From zero to generated data in 5 minutes
If you just want to get data out as fast as possible, follow this path. Each step links to the detailed section below.
Open the app, enter your credentials, land on the Workspace Selector.
Click New Workspace, name it (e.g. My First Project), confirm.
Add entities, configure fields with types, define any FK relationships.
Verify the dependency graph resolves correctly before running.
Choose output format, click Generate, watch live progress.
Preview the data table, download your files, review validation results.
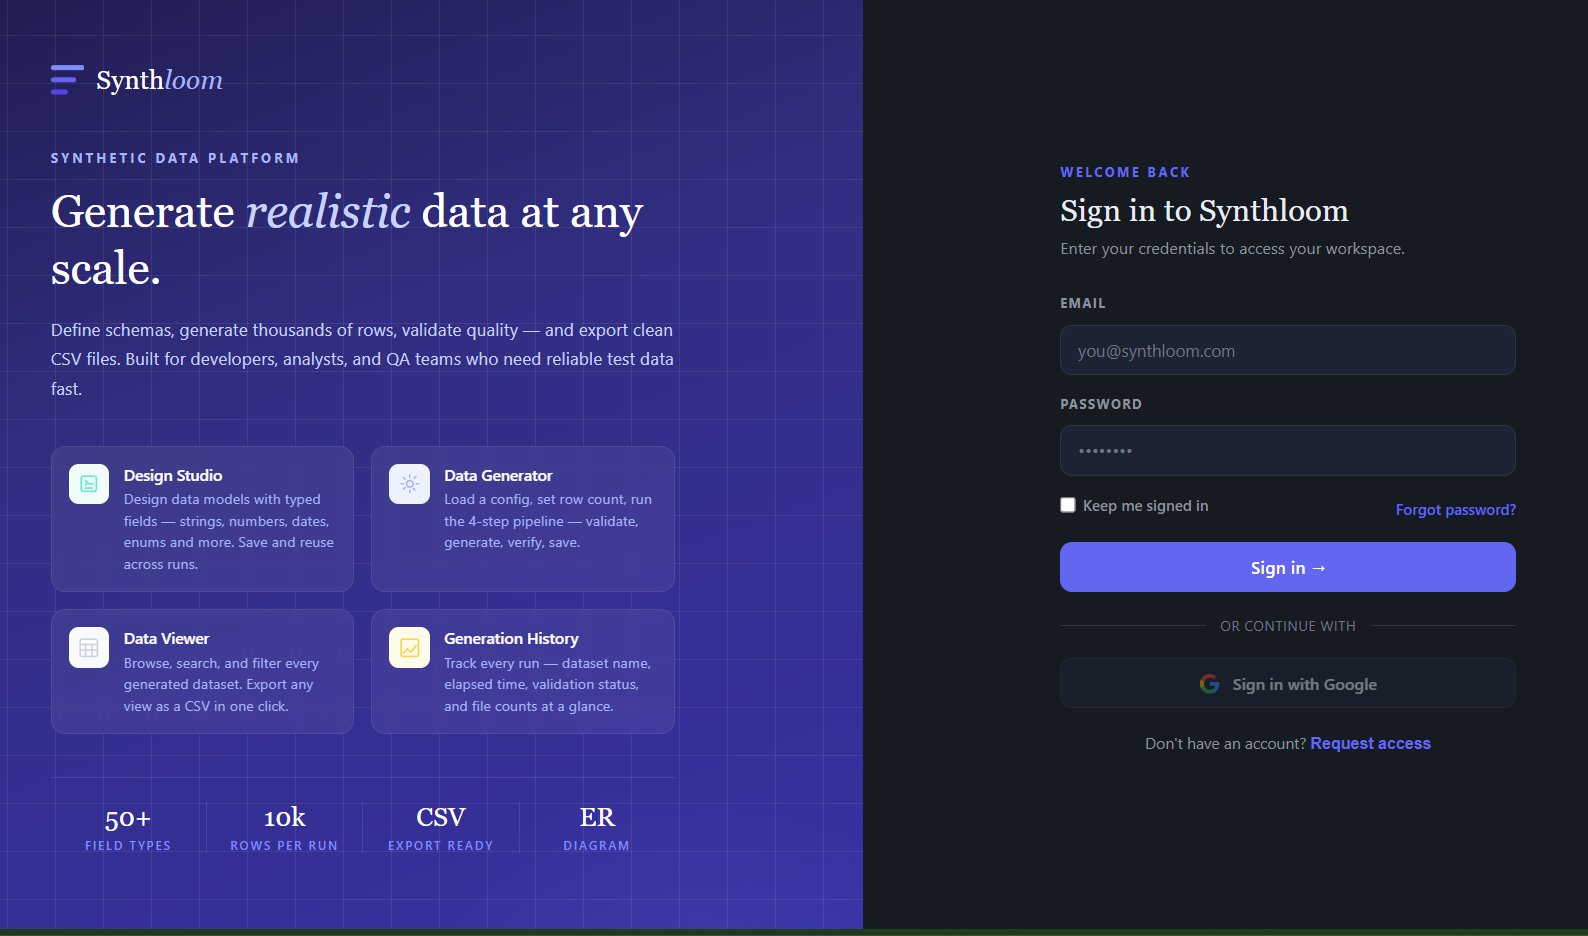
Login
Synthloom uses token-based authentication. Every user must log in before accessing any feature.
-
Open the application
Navigate to
https://www.synthloom.in. You will be redirected to the Login page automatically. -
Enter your credentials
Type your username and password in the form fields.
-
Click Sign In
On success, you are redirected to the Workspace Selector. Your session token is stored securely in memory for the duration of your browser session.
Workspaces
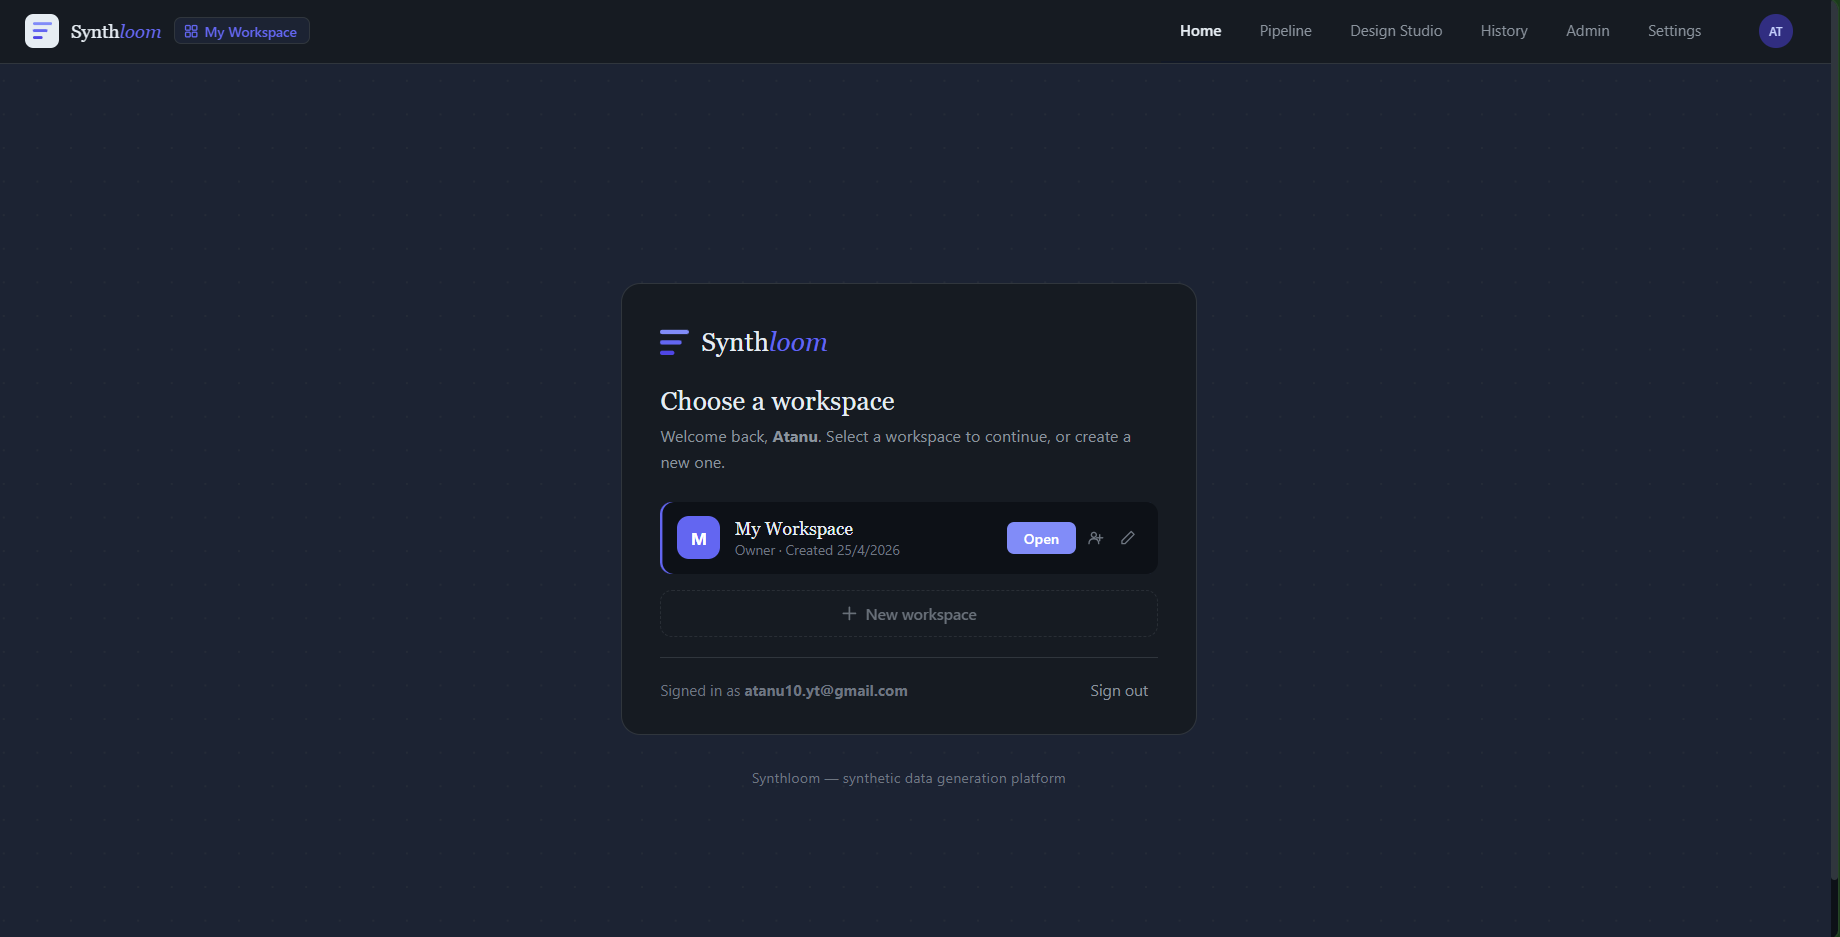
Workspaces are isolated project containers. Each workspace has its own configurations, generation history, and output files — completely separate from other workspaces.
Creating a workspace
-
Open the Workspace Selector
After login you land here automatically, or click your workspace name in the top navigation bar at any time.
-
Click "New Workspace"
Enter a descriptive name (e.g. Retail Demo, Healthcare Q2). Names help you identify the project at a glance.
-
Confirm creation
The new workspace is created and becomes your active context immediately. All subsequent actions apply to this workspace.
Other workspace actions
| Action | How |
|---|---|
| Switch workspace | Click any workspace card to make it active |
| Rename workspace | Click the pencil icon next to the workspace name |
| Share workspace | Click the share icon → enter a colleague's email and choose a role (Viewer / Editor) |
| Delete workspace | Click the trash icon — this is permanent and removes all configurations and output |
Design Studio — Overview
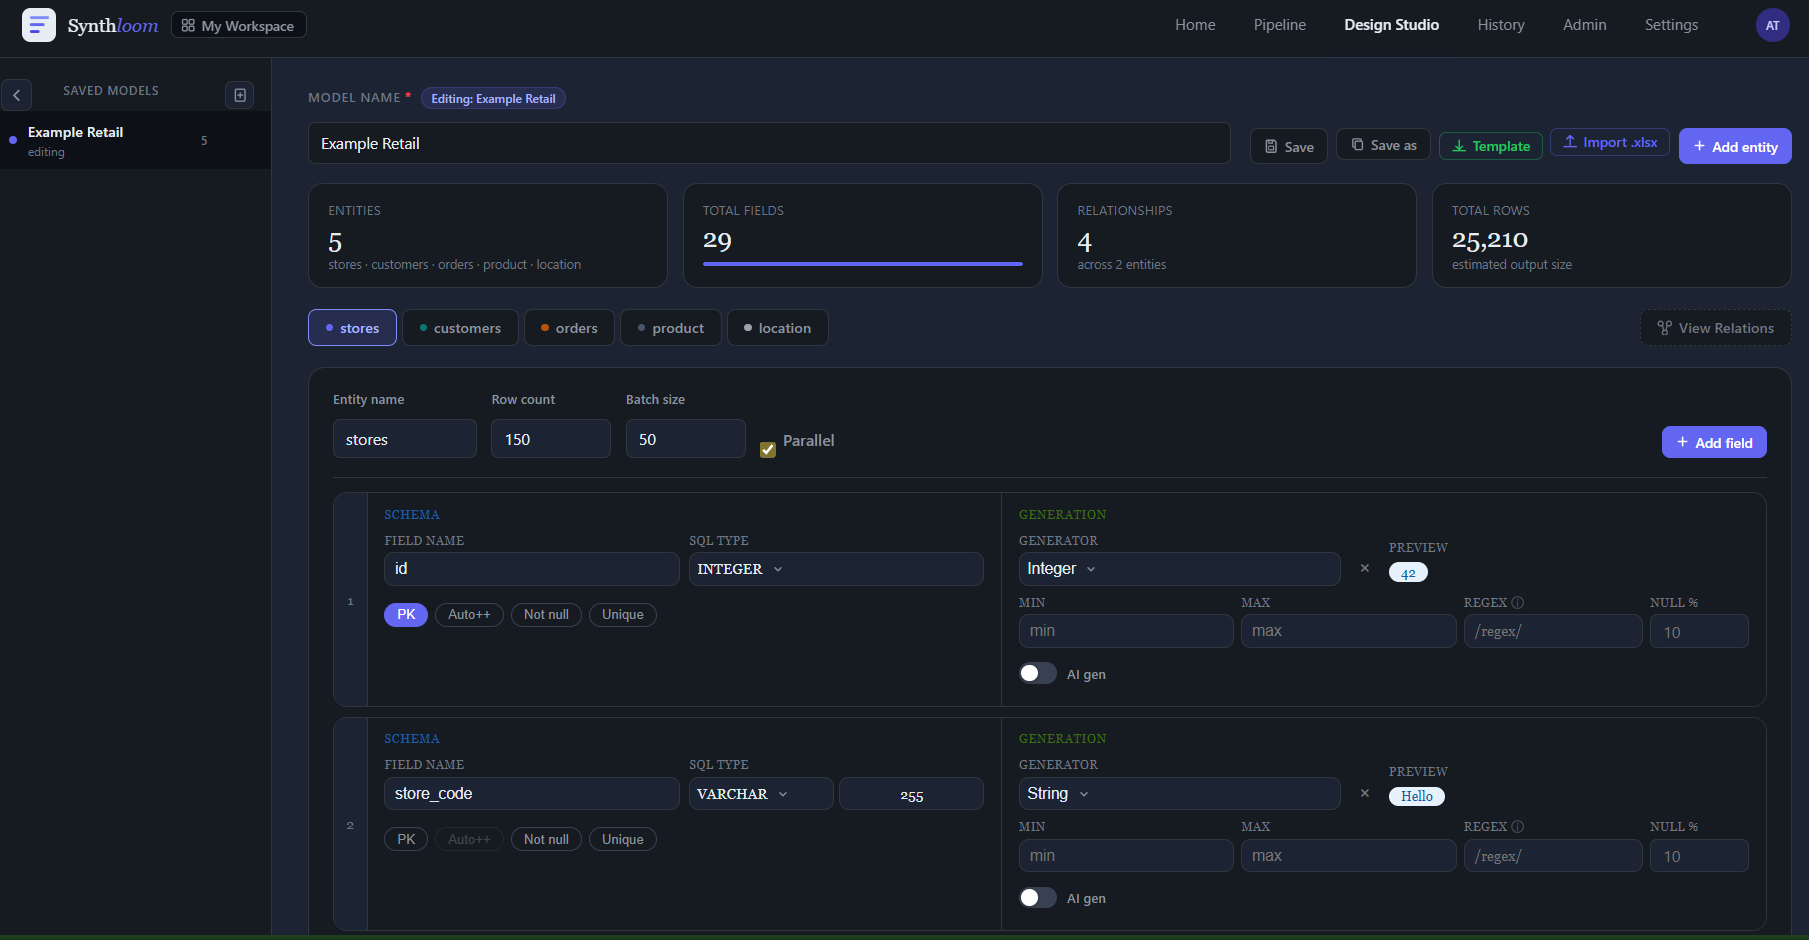
The Design Studio is the heart of Synthloom. It is where you describe everything about the data you want to generate: what entities (tables) exist, what fields each entity has, what data types those fields produce, and how entities relate to each other through foreign keys.
Everything you define here is stored as a configuration (a JSON document) that is then handed to the pipeline engine to produce data.
Opening Design Studio
-
Click "Design Studio" in the left navigation
This is available from any page once you have an active workspace.
-
Choose how to start
Option When to use New Config Starting from scratch for a new data model Load saved config Continue editing a previously saved configuration Import JSON Load a config file exported from another workspace or shared by a teammate
Adding & Configuring Entities
An entity maps to a single table or dataset in your output — for example Customers, Orders, Products, or Transactions. Every entity you add will produce its own output file.
Step-by-step: add your first entity
-
Click "+ Add Entity"
A new entity card appears in the editor panel with a default name like
Entity_1. -
Name the entity
Use a clear, singular noun in PascalCase or snake_case to match your target schema — e.g.
Customer,order,product_variant. -
Set the record count
Enter how many rows to generate for this entity. Think about realistic ratios — if you want 1,000 customers and a real business would have ~5 orders per customer, set Orders to 5,000.
Tip — Start small (e.g. 100 rows) for your first run to validate structure quickly. Scale up once you're happy with the schema. -
Add fields (see next section)
Click + Add Field inside the entity card to begin adding fields.
-
Repeat for each entity
Add all the entities your data model requires before moving on to relationships. It's easier to wire FK links once all entities exist.
Configuring Fields
Fields are the columns within an entity. Each field has a name, a type, and optional constraints.
Adding a field
-
Click "+ Add Field" inside an entity card
A new field row appears with an empty name and the default type
String. -
Enter the field name
Use the exact column name you want in the output file — e.g.
customer_id,email,signup_date,order_total. -
Choose a type
Click the type picker button to open the full type menu. See the Field Type Reference below for all available types.
-
Set constraints (if applicable)
Depending on the type chosen, additional options appear:
Constraint Applies to What it does Min / Max Numeric, Date, DateTime Clamps the generated value within a range Unique Any field Guarantees no duplicate values across the dataset Nullable Any field Allows a configurable percentage of null values Null % Any nullable field Percentage of rows that will receive a null (0–100) Enum values Enum type Comma-separated list of allowed values to sample from Format String, Date e.g. YYYY-MM-DDfor dates, regex patterns for stringsAI Enrich String, Paragraph Marks this field to be post-processed by the configured LLM Prefix / Suffix String, ID Static text prepended/appended to every generated value -
Reorder fields (optional)
Drag the handle on the left of any field row to reorder. Column order in the output matches field order in the editor.
-
Delete a field
Click the trash icon at the right end of the field row. This cannot be undone once the config is saved.
Field Type Reference
Synthloom provides a rich library of types. Click the type picker on any field to browse them by category.
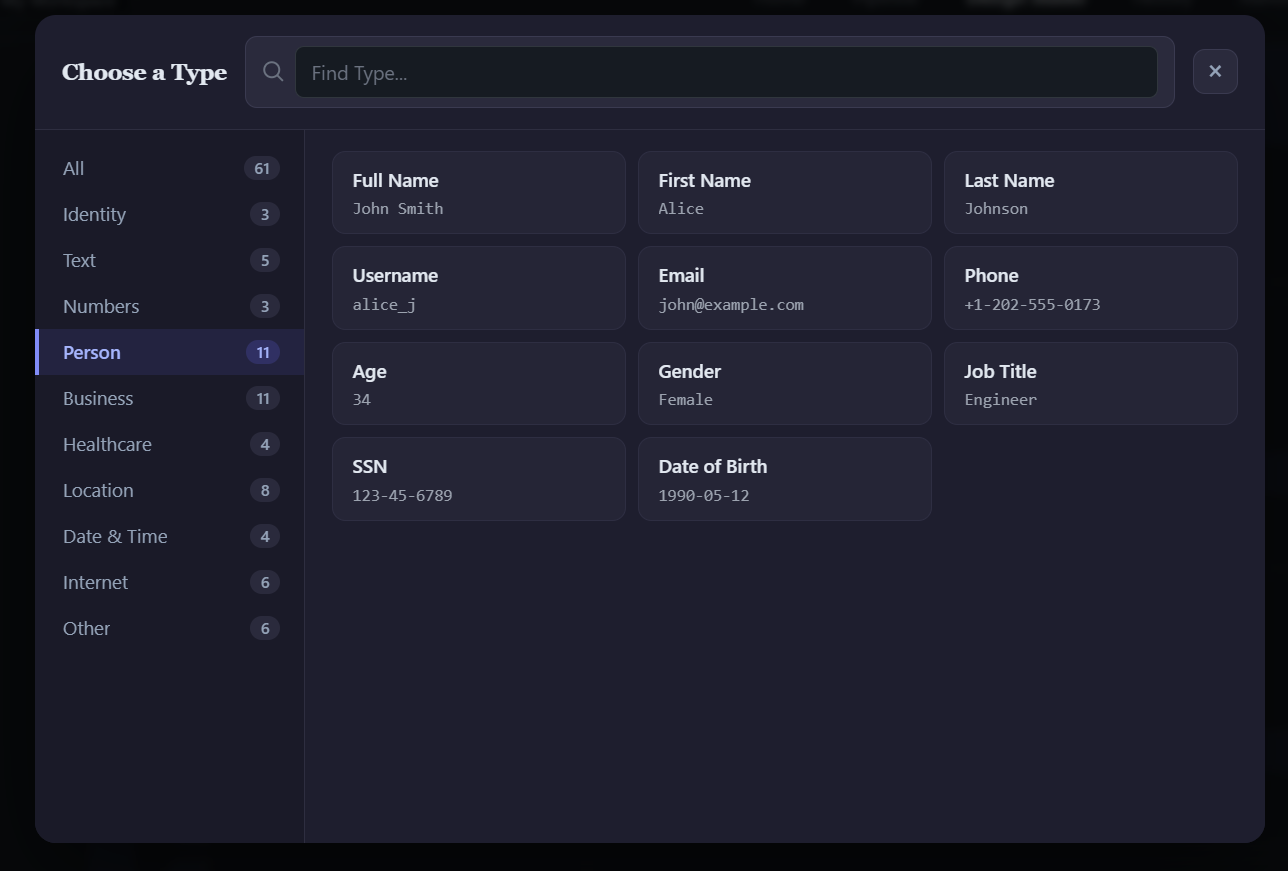
| Category | Types | Example output |
|---|---|---|
| Identity | UUID, Integer ID, Auto Increment | a3f9c1d2-…, 1001, 1, 2, … |
| Personal | Full Name, First Name, Last Name, Email, Phone, Username, Password Hash | Jane Smith, jane.smith@email.com, +1-555-0199 |
| Location | Street Address, City, State, Country, Zip Code, Latitude, Longitude | 742 Evergreen Terrace, Springfield, IL |
| Date & Time | Date, DateTime, Timestamp (Unix), Time, Year, Month, Day | 2024-03-15, 2024-03-15T09:23:11Z, 1710494591 |
| Financial | Price, Currency Code, Amount, Credit Card, IBAN, BIC | 149.99, USD, 4111 1111 1111 1111 |
| Internet | URL, Domain, IPv4, IPv6, MAC Address, User Agent, Slug | https://example.com/path, 192.168.1.42 |
| Business | Company Name, Job Title, Department, Industry, EIN | Acme Corp, Senior Data Engineer, Finance |
| Text | Word, Sentence, Paragraph, Lorem Ipsum (N words) | Realistic sentence about the topic. |
| Special | Foreign Key, Enum, Boolean, Constant, Null, Computed | References parent entity IDs; fixed enum list; true/false |
product_description or support_notes.
Relationships & Foreign Keys
Relationships tell Synthloom how entities connect. A Foreign Key (FK) field in a child entity references the ID field of a parent entity. At generation time, Synthloom samples real IDs from the already-generated parent and assigns them to the FK column — guaranteeing referential integrity automatically.
Step-by-step: create a FK relationship
-
Go to the child entity
For example, Orders references Customers, so Orders is the child.
-
Add or select the FK field
Click + Add Field. Name it
customer_id(or whatever matches your schema). -
Set the type to "Foreign Key"
Open the type picker → Special → Foreign Key.
-
Select the referenced entity
A dropdown appears listing all other entities in the config. Choose Customer.
-
Select the referenced field
Choose the field that acts as the primary key — typically
customer_idorid. Synthloom will sample values from this field. -
Set cardinality (optional)
If you want each customer to have a bounded number of orders, set a Max refs per parent value. Leave blank for unlimited.
-
Verify in the Relationship Graph
Switch to the Graph tab to see a visual representation of all FK edges. Confirm the arrow runs in the right direction (child → parent).
Multi-level relationships
You can chain as many levels as your model requires:
Customer → Order → OrderLineItem → ProductEach entity is generated in the correct topological order. Customer first, then Order (sampling Customer IDs), then OrderLineItem (sampling Order IDs and Product IDs), and so on.
ER Diagram View
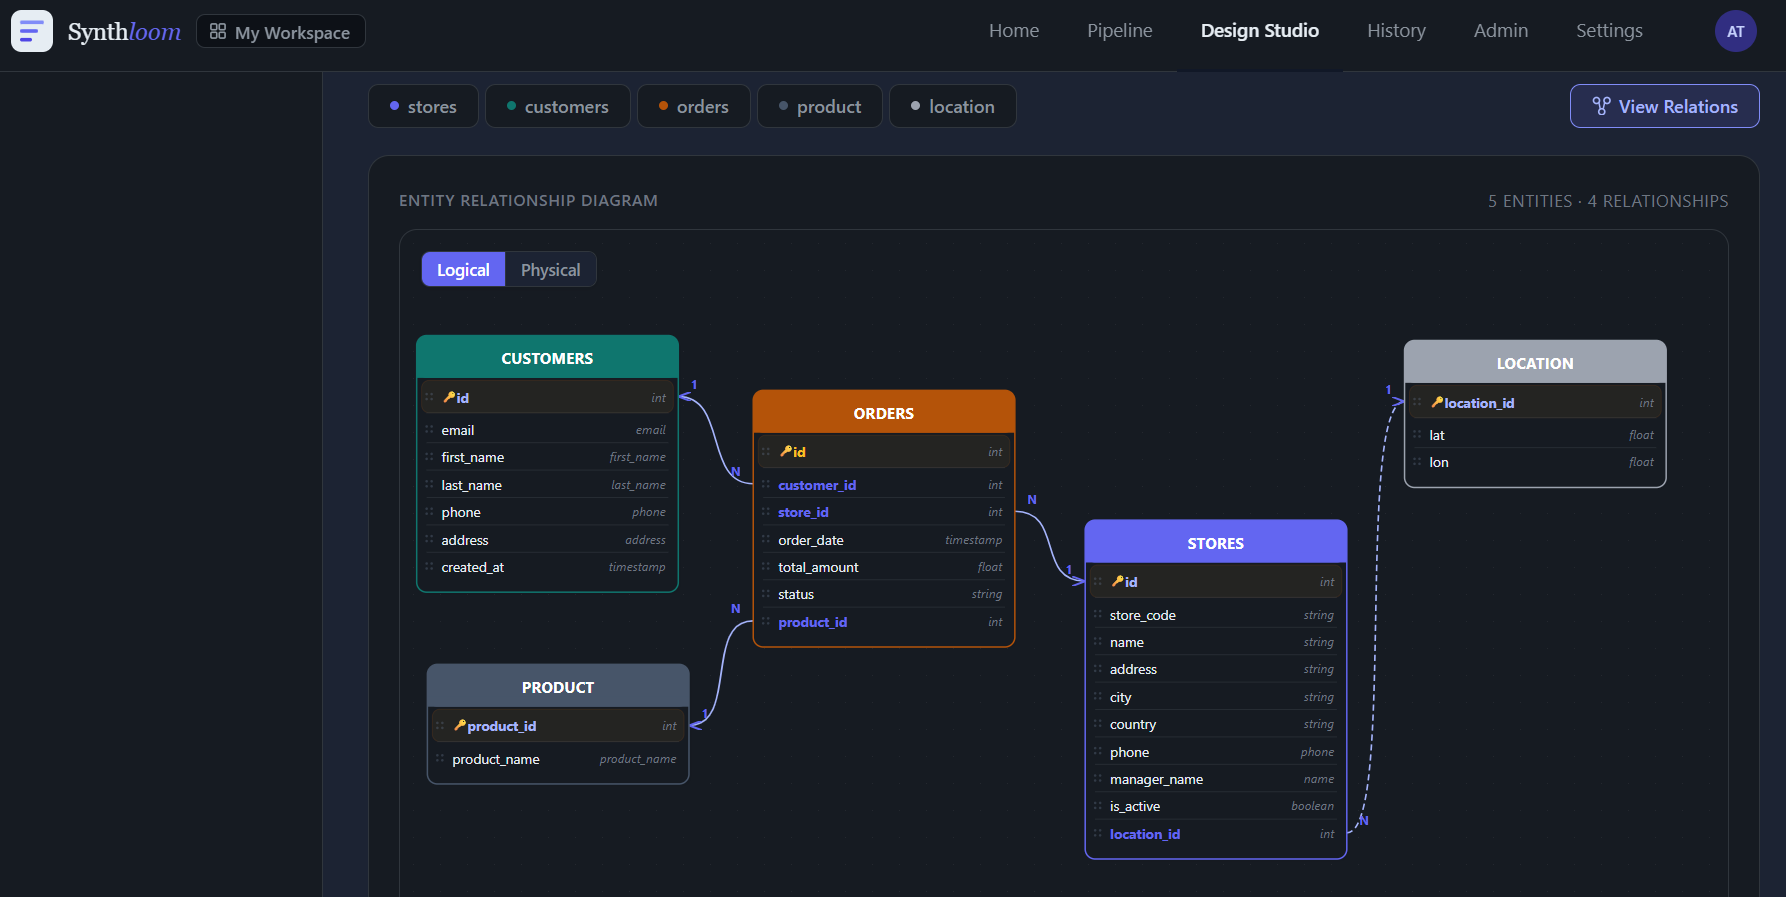
The ER Diagram tab inside Design Studio renders your data model as an entity-relationship diagram — showing all entities, their fields, and the FK links between them. It updates live as you make changes.
-
Click the "ER Diagram" tab
Located at the top of the Design Studio panel, next to the default "Fields" tab.
-
Review the diagram
Each entity is rendered as a card listing its fields. FK relationships are drawn as directed arrows connecting child fields to the parent entity's key field.
-
Interact with the graph
Drag entity cards to rearrange the layout. Hover an entity to highlight its immediate relationships. Click an arrow to see the FK details.
-
Use it as a validation check
Before saving and generating, confirm that every expected relationship is correctly represented. Missing arrows indicate a FK link was not set up.
Saving & Exporting Configurations
Save to workspace
-
Click the Save button
Located in the top action bar of Design Studio. A modal appears prompting for a configuration name.
-
Name the configuration
Use a descriptive version-aware name — e.g. Retail_v2, Healthcare_Q2_2026. You can have multiple configurations in a single workspace.
-
Confirm
The config is persisted in the workspace. It will appear in the load dropdown next time you open Design Studio, and in the Pipeline / Generate page for selection.
Export to JSON
-
Click "Export JSON"
Downloads the configuration as a
.jsonfile to your browser's download folder. -
Version-control it
The JSON is self-contained and human-readable. Commit it to Git alongside your application code so your test data schema is tracked with your codebase.
-
Import into another workspace
Use Import JSON in any workspace to load the same configuration — useful for sharing between team members or promoting across environments.
Pipeline DAG View
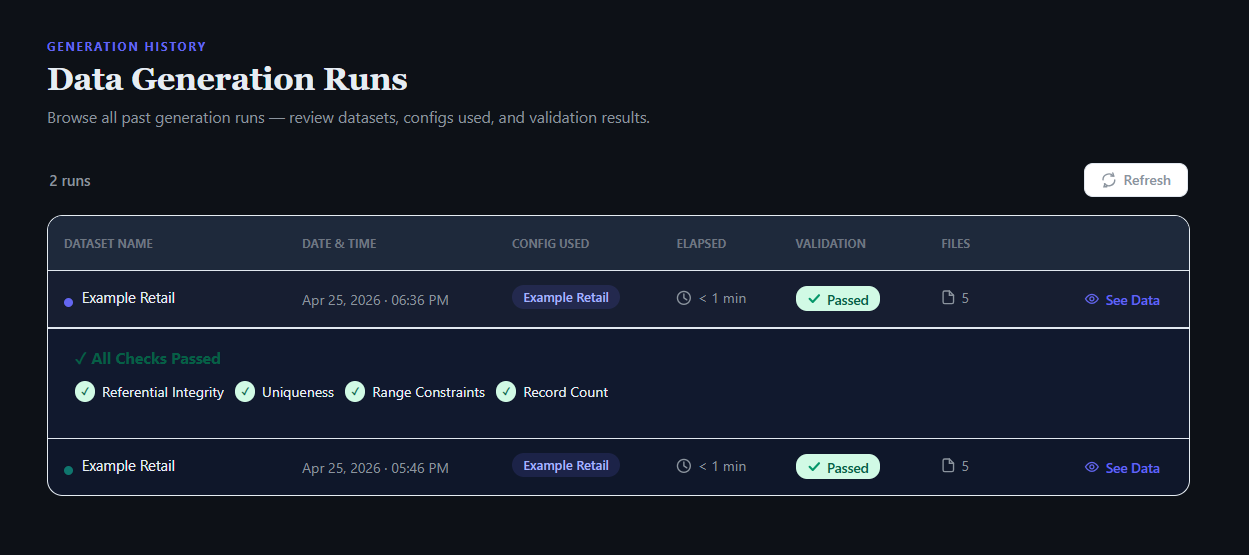
Before generating data, Synthloom analyses your configuration and builds a Directed Acyclic Graph (DAG) of entity dependencies. The Pipeline page lets you inspect this graph interactively — so you can verify the correct generation order before committing to a large run.
What the DAG represents
Each node is an entity. Each directed edge (arrow) is a foreign key dependency — it points from the child entity to the parent it depends on. An entity can only be generated after all its parents have completed.
Step-by-step: reading the Pipeline view
-
Navigate to "Pipeline" in the top nav
Select the saved configuration from the dropdown at the top of the page. The DAG renders immediately.
-
Identify generation levels
Entities are visually grouped by level — entities at the same horizontal level run concurrently in parallel mode. A typical retail model might look like:
Level 0 (parallel): Customer, Product, Category
Level 1 (parallel): Order, ProductVariant
Level 2 (sequential): OrderLineItem (depends on Order + Product) -
Hover a node for details
Hovering any entity node shows its field count, record count, and the list of entities it depends on or is depended on by.
-
Follow the arrows
Arrows point from child to parent. If OrderLineItem → Order, it means OrderLineItem has a FK referencing Order, so Order must exist first.
-
Check for circular dependency warnings
If any cycle is detected, the affected nodes are highlighted in red and a warning banner explains which entities form the cycle. Return to Design Studio to break the cycle before proceeding.
Understanding Parallel Groups
Parallel groups are the key to Synthloom's speed. When you enable Parallel mode in the generation options, all entities within the same DAG level are generated concurrently in separate threads — dramatically reducing wall-clock time for complex, multi-entity configs.
| Scenario | Sequential time | Parallel time (approx.) |
|---|---|---|
| 3 independent root entities, 100K rows each | ~30s | ~10s |
| 5-entity chain (no parallelism possible) | ~50s | ~50s (no gain) |
| Mixed model: 2 levels, 4 entities in level 0 | ~80s | ~25s |
Design tips for maximum parallelism
- Keep lookup/reference entities (e.g. Category, Status, Region) at level 0 with no FKs to other entities.
- Avoid chaining more than 3–4 FK levels deep. Each additional level adds a sequential step.
- If two entities have a many-to-many relationship, model the join entity separately — it will be assigned to the deepest level required by its parents.
- Use the Pipeline view to confirm which level each entity sits on before committing to a large run.
Running a Generation Job
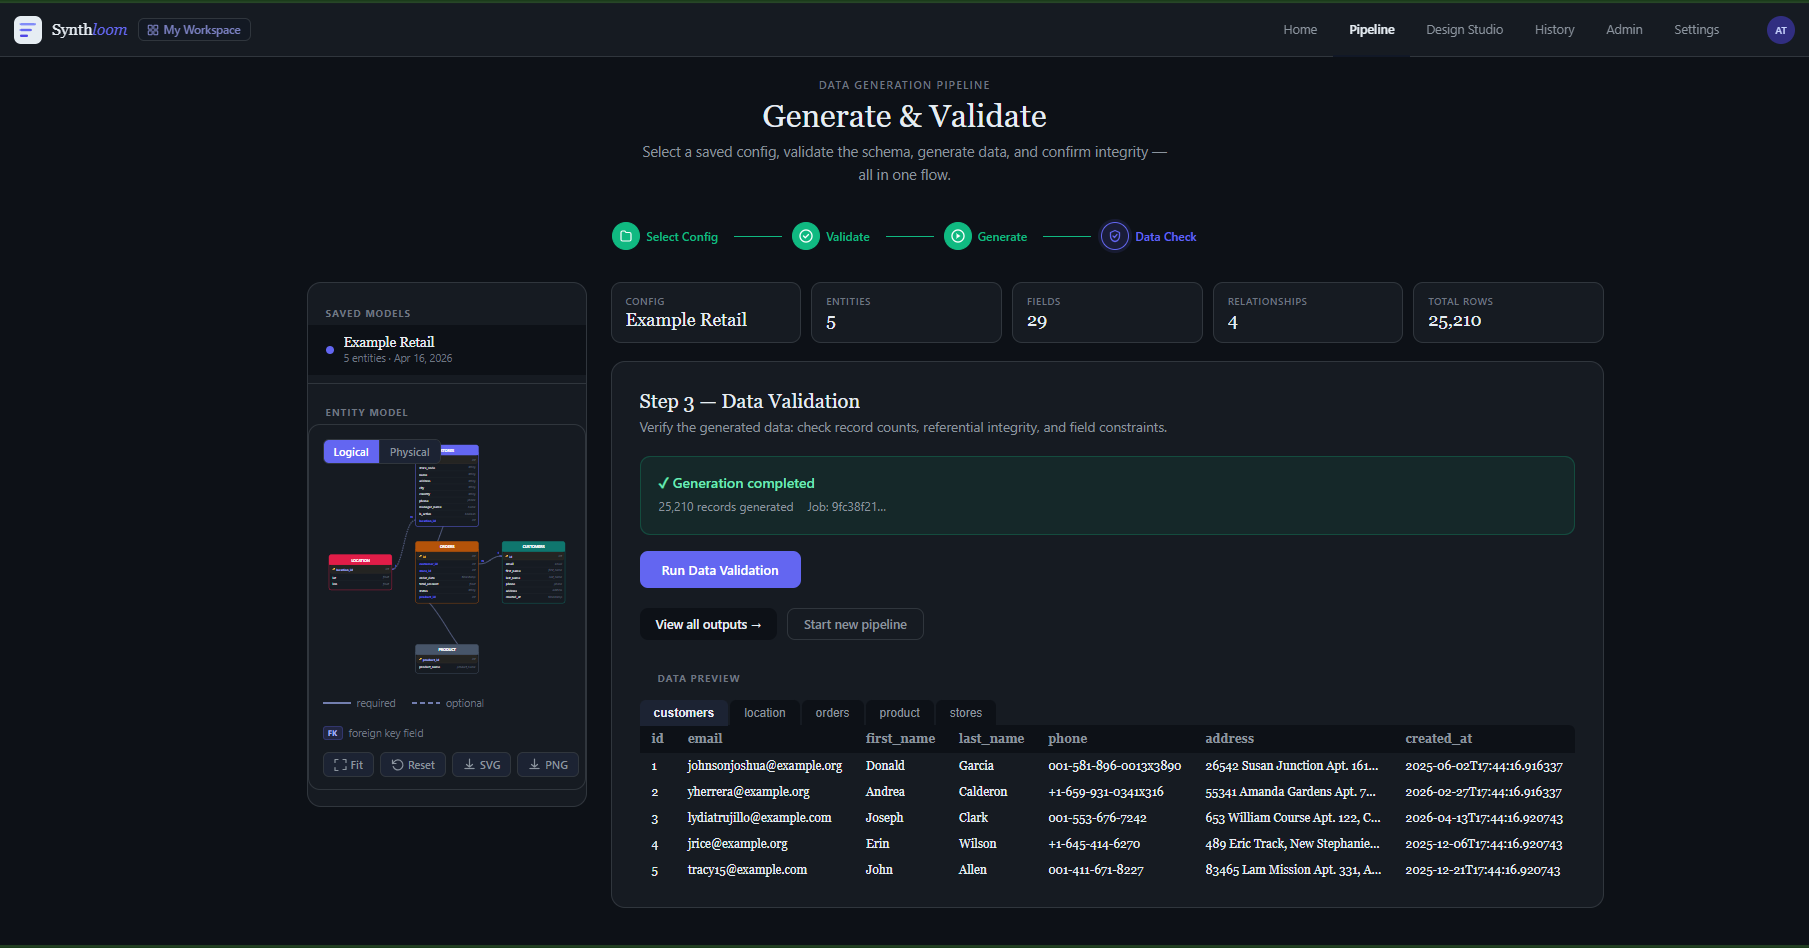
The Generate page lets you launch a generation job, configure output options, and monitor progress in real time via WebSocket updates.
Starting a generation
-
Navigate to "Pipeline"
Click Pipeline in the top navigation menu.
-
Select a configuration
Choose the saved configuration you created in the previous step from the dropdown. The config name and entity list are shown for confirmation.
-
Choose your output format
Format Best for CSV Spreadsheets, general-purpose tools JSON APIs, document stores, web apps Parquet Big data pipelines, analytics engines -
Configure generation options
Option Description Seed Integer seed for reproducibility. Same seed → identical output every time. Validate RI Run referential integrity checks after generation (recommended). Parallel mode Generate independent entity groups concurrently for speed. Enable AI Pass marked fields through an LLM for realistic contextual text. AI Provider OpenAI or Anthropic (configured in Settings). -
Click "Generate"
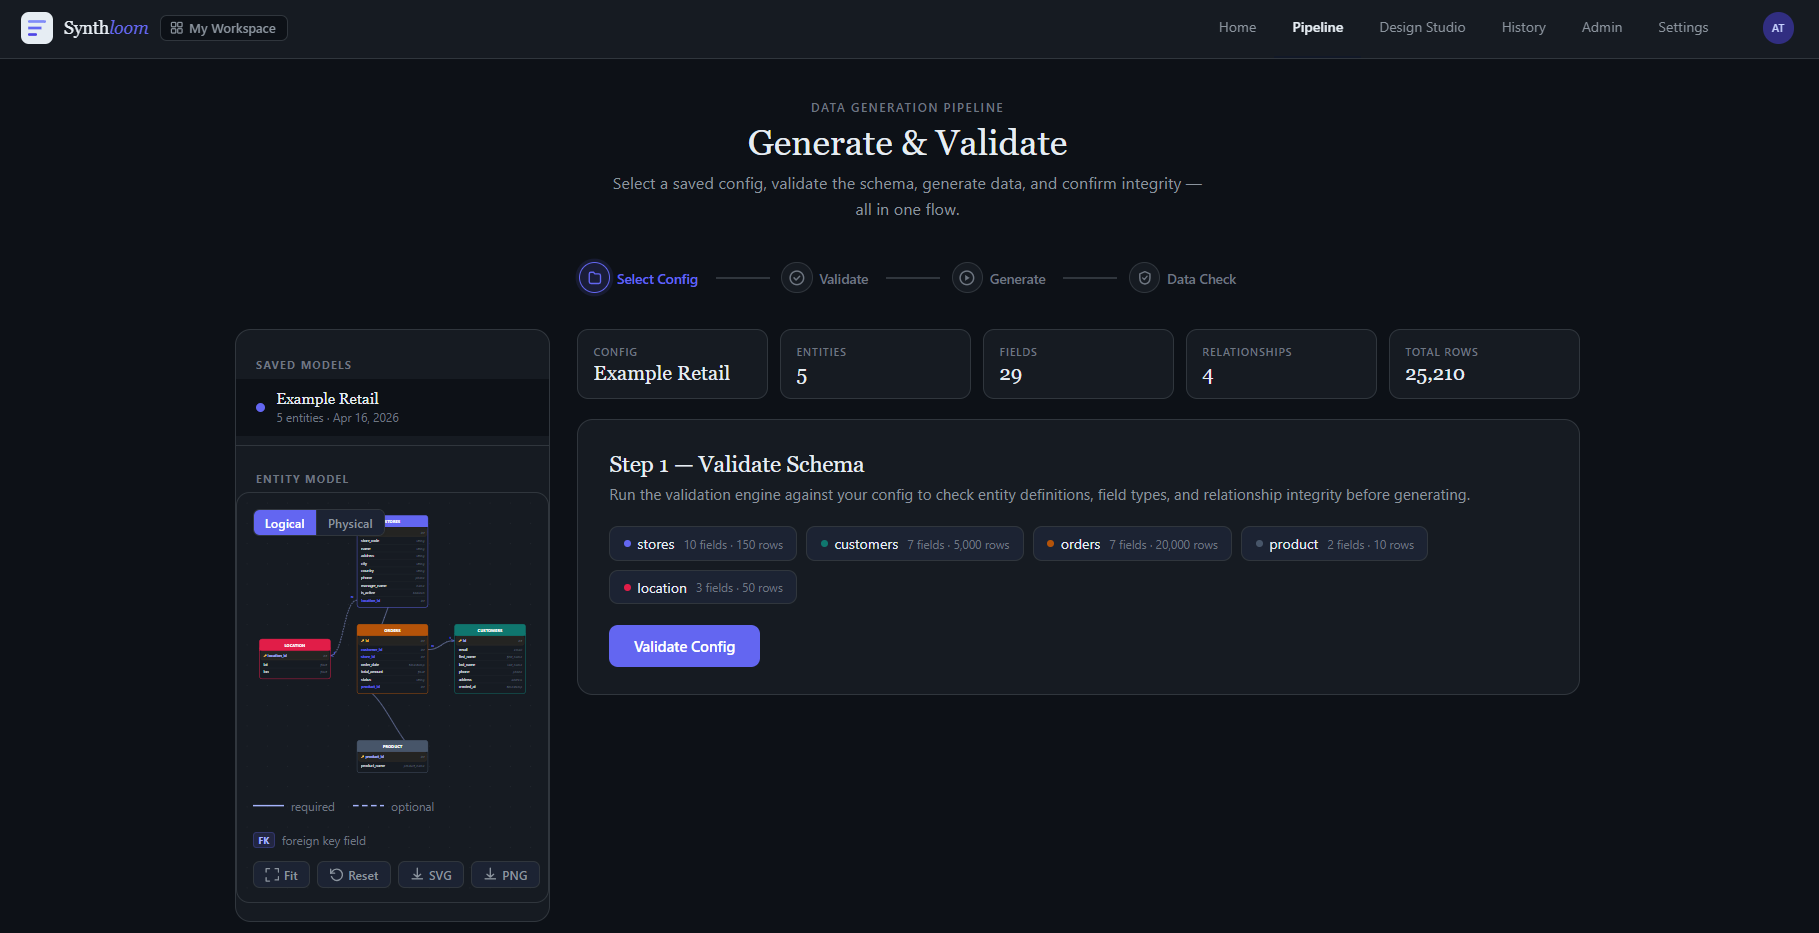
The job starts immediately. A real-time progress panel appears showing the current entity being processed, records written, and elapsed time.
Reading the progress panel
While a job runs you can see:
- Current entity — the entity currently being generated
- Records written — live count updated over WebSocket
- Stage — generation level (parallel groups are labelled)
- Elapsed time — wall-clock duration since job start
- Log tail — last few log lines from the backend for debugging
Viewing & Downloading Output
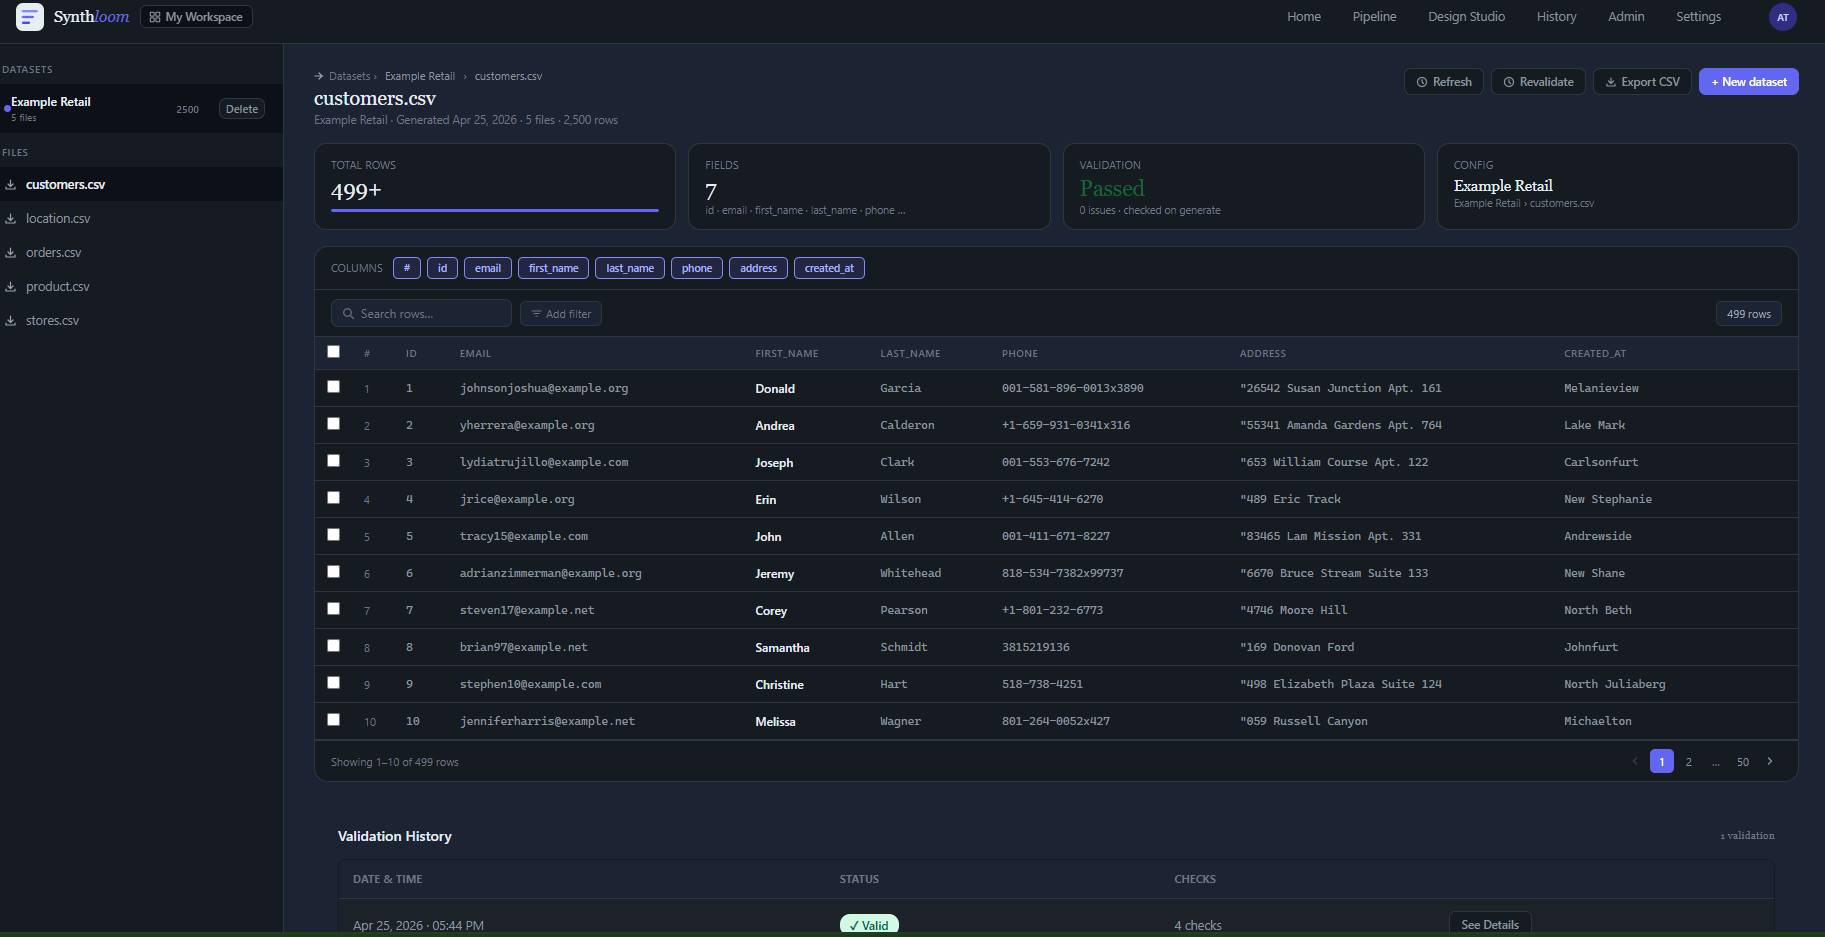
The Output Viewer gives you a searchable, paginated data table for every generated file, plus one-click download options.
-
Navigate to view data
After a job completes you are prompted to view the output, or navigate manually via the top "History"menu.
-
Select an output folder
Each generation run produces a timestamped folder. Click a folder to see the files it contains (one file per entity by default).
-
Preview a file
Click any file to load an inline data table. Use the search bar to filter rows, the column selector to hide/show fields, and the pagination controls to navigate large datasets.
-
Download
Click Download to save the file in its original format (CSV, JSON, or Parquet). You can also download all files in the folder as a ZIP.
Validating Your Dataset
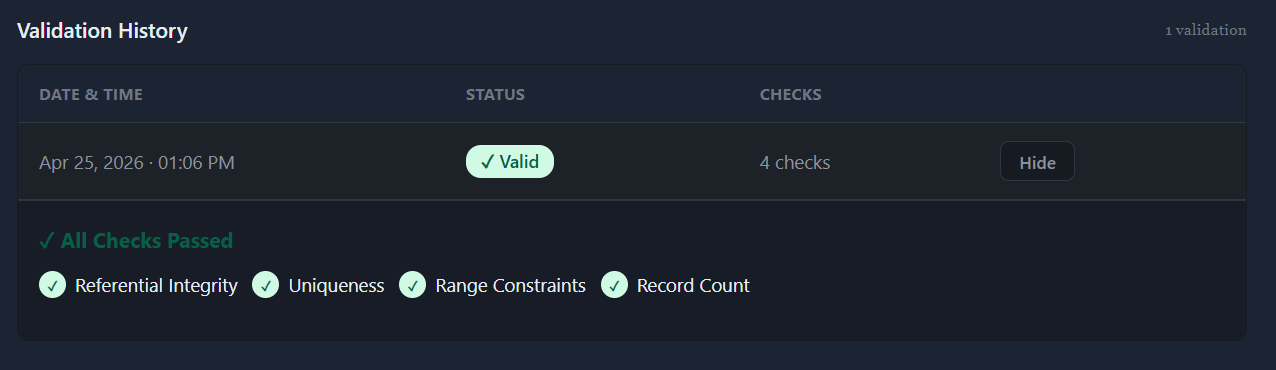
The Validation Results page shows a detailed report on the quality of the last generation run — covering referential integrity, uniqueness, value ranges, and custom business-rule compliance.
-
Navigate to "Validation"
Click Validation in the left menu. Results from the most recent job are loaded automatically.
-
Review the summary
A top-level summary card shows the overall pass/fail status and a count of checks performed.
-
Inspect individual checks
Each check is listed with its entity, field, type, and result. Failed checks show the number of violations and example values.
Validation check types
| Check | What it verifies |
|---|---|
| Referential Integrity | Every FK value in child entities exists in the parent entity |
| Uniqueness | Fields marked unique have no duplicate values |
| Range | Numeric fields are within the configured min/max bounds |
| Not Null | Required fields contain no null values |
| Enum | Enum fields only contain allowed values |
Generation History
The History page is an audit trail of every generation job run in the current workspace, including timestamps, configuration used, record counts, and final status.
-
Navigate to "History"
Click History in the top menu.
-
Browse past jobs
Each row shows the job ID, configuration name, start time, duration, total records, output format, and status (Completed / Failed / Cancelled).
-
Jump to output or re-run
Click a job to open its output directly in the Output Viewer, or click Re-run to launch a new job with identical settings.
AI Settings
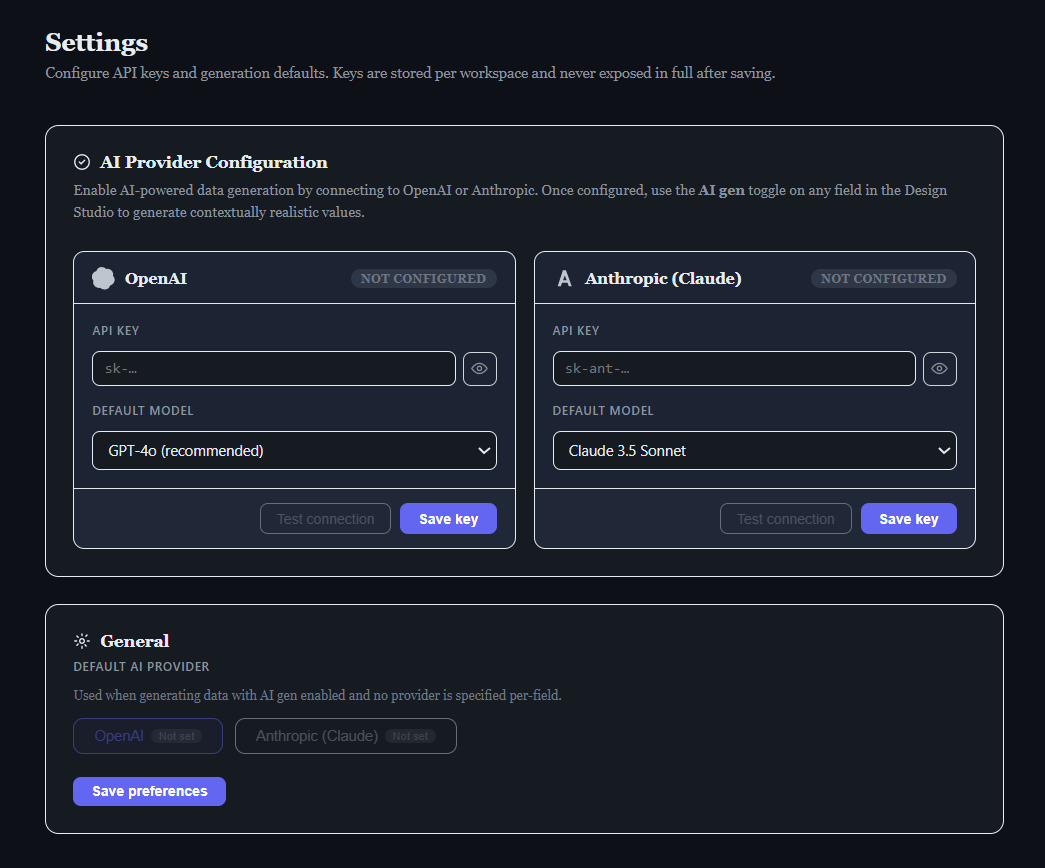
The Settings page is where you configure AI provider credentials and select the default model used for field enrichment.
Configuring OpenAI
-
Navigate to "Settings"
Click Settings in the left menu.
-
Enter your OpenAI API key
Paste the key (starts with
sk-…) into the OpenAI card. Use the eye icon to verify it before saving. -
Choose a model
Model Best for GPT-4o (recommended) Best quality / speed balance GPT-4o Mini Large volumes at lower cost GPT-4 Turbo Complex contextual generation GPT-3.5 Turbo Fastest, lowest cost -
Click "Test Connection"
Synthloom sends a minimal ping to the API to verify the key is valid before saving.
-
Save
The key is stored encrypted in the workspace settings. A masked hint (
sk-••••1234) confirms the key is active.
Configuring Anthropic Claude
The process mirrors OpenAI. Available Claude models:
| Model | Best for |
|---|---|
| Claude Haiku 4.5 (recommended) | Fast, cost-effective enrichment |
| Claude Opus 4.6 | Highest quality output |
| Claude Sonnet 4.5 | Balanced quality and speed |
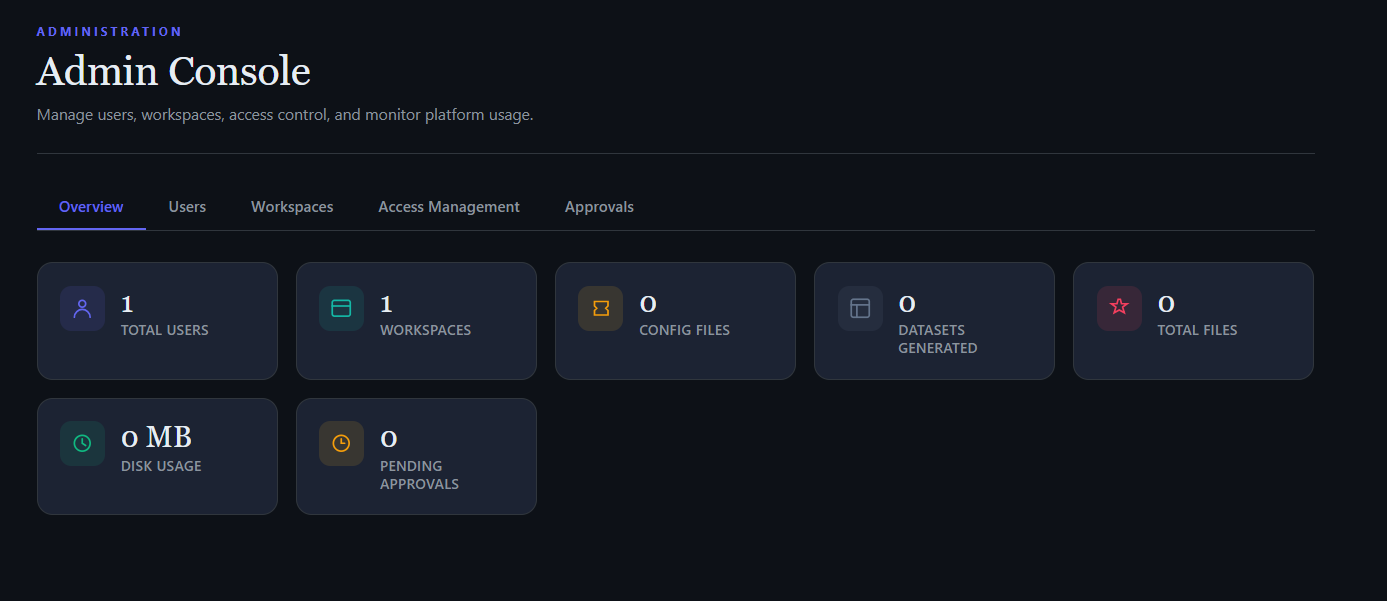
Admin Console
The Admin Console is available to administrator accounts only. It provides user management, workspace oversight, and system-level controls.
-
Navigate to "Admin"
The Admin link appears in the navigation only if your account has the admin role.
-
Manage users
View all registered users, their roles, and their active workspaces. You can promote users to admin, reset passwords, or deactivate accounts.
-
Oversee workspaces
See all workspaces across all users — useful for monitoring storage usage and cleaning up orphaned workspaces.
-
System settings
Configure global defaults such as the default AI provider, max parallel workers, and record count limits per workspace.